
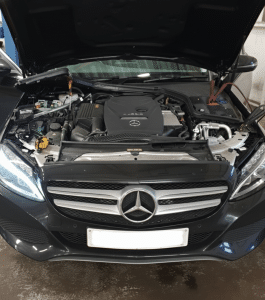
Mercedes CLS320 Boost Problem
By the time Mr C arrived at JDK Automotive in Camberley, he was running out of options.
His Mercedes CLS320 had already visited a number of garages, yet no one felt able to take the job on. Each attempt ended the same way, with the car returned to him and no meaningful progress made.
The situation was wearing him down. Some days the Mercedes drove normally, but on others it became sluggish, dropping power mid-journey and leaving Mr C unsure what the car might do next. Despite these clear symptoms, previous assessments hadn’t uncovered the cause.
It was a difficult position for any driver: a premium vehicle that should have offered dependable performance had become unpredictable and frustrating to live with.
That’s when Mr C turned to JDK Automotive. As Mercedes specialists for drivers across Camberley and Farnborough, we’re used to tackling the complex cases, the kind that need careful thought, technical understanding, and the right diagnostic approach.
It was time to dig into the details and find out what was really happening under the bonnet.
First Steps in Diagnosing a Mercedes CLS320 Boost Problem
With the Mercedes now in the workshop at JDK Automotive, our first task was simply to listen. Before any testing begins, understanding the driver’s experience is essential. We asked Mr C to describe when the loss of power occurred, how long it had been happening, and what he’d noticed each time the issue appeared. This helps us build a clear and accurate starting point for the investigation ahead.
Once we had that context, we connected our dealer-level diagnostic software to the vehicle to see what the control modules had recorded. The scan revealed six stored fault codes, each relating to different parts of the engine’s airflow and emissions systems:
- P2626 – DPF soot content too high
The diesel particulate filter had registered excessive soot buildup, indicating the system wasn’t regenerating as expected. - P2530 – Inlet port shutoff motor short to ground
A fault had been logged for the swirl flap actuator, which manages airflow through the inlet manifold to support efficient combustion. - P2527 – EGR positioner short to ground
The exhaust gas recirculation valve wasn’t receiving the voltage it needed to regulate exhaust flow back into the engine. - P2514 – Crankcase ventilation line heater short to ground
A small heating element within the breather system had lost its electrical supply. - P2526 – Charge pressure positioner short to ground
The turbocharger’s actuator wasn’t receiving its voltage feed, affecting how boost pressure is controlled. - P2376 – Throttle valve actuator voltage low
The throttle valve was detecting a low voltage signal, limiting its ability to assist with airflow and emissions management.
These findings gave us useful direction, but they were only the starting point. When so many actuator-related faults appear at once, it often indicates a shared issue rather than multiple unrelated failures. The next step was to dig deeper and uncover what was linking these results.
Digging Deeper Into the Mercedes CLS320 Boost Problem
With the initial clues recorded, the next stage at JDK Automotive was to carry out a more detailed investigation. When a Mercedes logs several actuator-related electrical faults at the same time, it usually means they are linked by a common cause. To uncover what was behind this behaviour, we worked through the diagnosis in clear, structured steps.
Step 1: Checking the Shared Electrical Supply
The first part of the deeper investigation was to confirm whether the components mentioned in the fault scan were all drawing from the same voltage feed. Using the wiring information for this model, our technician traced the supply lines for the turbocharger actuator, the EGR positioner, the swirl flap actuator, the throttle valve actuator and the crankcase ventilation line heater.
On this vehicle, all of these components share the same fuse-protected circuit.
- The fuse on this circuit was inspected and found to have failed.
- With the fuse open, every component on that feed would have lost its voltage supply at the same moment, which aligned with the number of electrical faults stored earlier.
A replacement fuse was fitted to restore the circuit.
- Several of the stored fault codes cleared immediately, confirming that we were on the right track with the first stage of the diagnosis.
- Some of the codes returned shortly afterwards, indicating that something connected to that circuit was still drawing excessive current.
This showed that the underlying issue lay somewhere on that shared supply line. The next step was to examine each component on the circuit more closely.
Step 2: Inspecting the Components on the Circuit
Each actuator and sensor connected to the shared supply was then inspected for damage, contamination or electrical faults. Two findings stood out straight away:
- Oil contamination on the swirl flap actuator
The swirl flap actuator, which adjusts airflow within the inlet manifold, was heavily contaminated with oil. Oil inside the actuator housing can damage the internal motor or cause electrical shorts, either of which can overload the shared fuse. - Mechanical damage to the turbocharger’s compressor wheel
The turbocharger showed clear signs of deterioration. The compressor wheel had visible impact marks, and oil was present where it shouldn’t have been. A failing turbo can release oil into the intake system, which can then affect nearby components, including the swirl flap actuator.
Together, these issues explained both the electrical overload across multiple components and the intermittent loss of boost that Mr C had been experiencing.
Step 3: Checking Circuit Stability Under Load
With the two likely causes identified, the next step was to confirm how the shared supply behaved once it was active again. After fitting the new fuse, we monitored the current draw across each component on the line to ensure nothing else was causing an overload.
- When the swirl flap actuator was unplugged, the fuse held without failing. This confirmed the actuator was responsible for the electrical fault.
- The turbocharger actuator, although now receiving its voltage feed, still could not operate correctly due to the mechanical damage identified earlier.
This stage of testing proved how the faults were connected and what had triggered the warnings stored in the initial scan.
Step 4: Agreeing the Repair Plan
Now that we had a clear understanding of what was causing the issues, we could put together a repair plan tailored to getting the Mercedes back to its best. The diagnostic checks had already highlighted the electrical problem on the shared feed, and the replacement fuse installed earlier had restored that supply.
From this point, the focus turned to putting right each of the faults we had uncovered:
- Turbocharger replacement
The worn turbocharger was replaced to bring back stable, controlled boost pressure. - Swirl flap actuator replacement
A new actuator was fitted to remove the electrical fault on the shared circuit. - Swirl flap mechanism repair
The swirl flap assembly was repaired using a connecting rod and repair kit, avoiding the need for a complete inlet manifold replacement. - Intake system clean
The intake tract was cleaned to clear oil contamination and help protect the newly installed parts.
With the diagnostic work complete, we were confident this plan would resolve the Mercedes CLS320 boost problem and restore the car to peak performance.
Putting the Repair Plan Into Action
Once the diagnostic work was complete, we spoke with Mr C to walk him through the findings and outline the repairs needed. With his approval, our team at JDK Automotive began the work. This was a multi-stage repair, combining mechanical replacement with essential electrical fixes to restore the Mercedes.
Here’s what we carried out:
- Turbocharger replacement
A new OEM-spec turbocharger was installed to restore correct boost control and return the engine to smooth, consistent delivery. - Swirl flap actuator replacement
The failed actuator was replaced to eliminate the electrical fault on the shared circuit and re-establish the intake system. - Swirl flap mechanism repair
The swirl flap assembly was repaired using a connecting rod and a repair kit. This reinstated smooth movement of the flaps without the cost of replacing the entire inlet manifold. - Intake system clean
The intake area was cleaned thoroughly to remove oil residue and prevent contamination of the new components. - Circuit stability check
With the shared fuse already renewed during diagnosis, we carried out a final current-draw check to ensure the supply remained stable and all actuators were functioning correctly.
Each stage of the repair was followed by confirmation checks to ensure everything was operating as intended. This structured process meant the Mercedes CLS320 boost problem was resolved fully, and the car was returned to dependable performance.
A Successful Outcome for Mr C’s Mercedes CLS320
After reassembling the system and completing our final checks, the Mercedes performed exactly as it should. Boost pressure was stable, the engine responded cleanly, and the inconsistent behaviour that had been frustrating Mr C was gone. It had been a complex fault with several contributing factors, but it was successfully dealt with through a structured diagnostic process and a clear repair plan.
Mr C was relieved to finally have an answer. After visiting a number of garages that hadn’t been able to take the job on, he was pleased that JDK Automotive could diagnose the problem and complete the full repair in one visit. Choosing to repair the swirl flap mechanism rather than replace the entire inlet manifold also kept his overall costs down.
The result was a fully restored Mercedes CLS320 and a driver who finally had confidence in his vehicle again.
Expert Help for Your Mercedes in Camberley
If your Mercedes feels flat when accelerating, loses power without warning, or shows unexpected dashboard warnings, it’s time to have it checked. These symptoms can point to deeper issues, just like the complex case behind Mr C’s Mercedes CLS320, where multiple faults were hiding beneath the surface.
At JDK Automotive, our technicians have the knowledge, equipment and experience to uncover the real cause of performance problems. Whether your Mercedes is hesitating, struggling to build boost, or simply not driving the way it should, we can help.
Drivers choose us for:
- 12-month parts and labour guarantee
- Dealer-level diagnostic capability
- Specialist knowledge of Mercedes systems
- Access to the latest Mercedes technical information
Join the {{review-count}} customers who rate us {{average-rating}} stars on Google.
Call 01276 535585 to book your appointment and get your Mercedes back to its best.


